Showing posts with label card. Show all posts

Wednesday, October 5, 2011

Dilo en Español

I don't think I could have had more fun making this card! It started with inspiration from a few challenges:
  • Dilo en Español Challenge #1: Kraft Paper
    I've been following Abby's blog for a while, and am very excited about her new challenges inspired by her fab new Dilo en Español stamp sets. I only just bought a set, and I don't think a sentiment in Spanish is a requirement, but I was inspired so I used this cute Feliz Cumpleaños Ticket digi stamp by Marion.

  • Fun with Shapes Challenge #93: Shabby/Vintage
    This challenge blog is new-to-me,  and I love its mission of using "something punched or cut". For this card, I used my Cricut & their "Paper Dolls" cartridge (the circus tent), as well as two Recollections hand-punches. I made the borders with a star punch, and the banners made from the circle punch. For the additional "Shabby/Vintage" theme, I used my Tim Holtz paper distresser on all the edges.

  • Speedy the Cat's Friends Challenge Week 75: Use Polka Dots
    Polka dots seemed a perfect fit for the circus theme. I used a scrap of Graphic 45 paper for the tent, but I really tore into my Echo Park Dots & Stripes pack for the rest!

  • Crazy Amigo Challenge: Animals
    This challenge blog is also new-to-me, and it looks like fun! I didn't really have any circus animal stamps, so I used this cutey. I'm not quite sure what circus act this is ... Gassy the Zebra & his Gossipy Canary, I guess!
Originally, this is how the card was to look. But I really wanted to show off the background, so I made the tent fold down to create this sort of tent card:
Here's the card completely open. I stitched the message section with the same hemp rope I used to string the banners.

Update: Wow! This card won Dilo en Español Challenge #1! Muchísimas Gracias!

Thursday, September 1, 2011

For the love of School Supplies

Bugaboo stamps recently celebrated 400 followers on Crafters Digital Art Center (CDAC) by sharing a couple wonderful freebies -- thank you! -- and I decided to have my own celebration & make a card with them for Bugaboo's Wacky Wednesday Challenge at CDAC.

I had lots of inspiration for this card, best explained with a bulleted list:

  1. Bugaboo CDAC Wacky Wednesday Challenge #17
    • Paper-Piercing: I used nine papers to paper-piece the two images (didn't seem like so many, really! I used mostly scraps)
    • Faux Stitching: I digitally designed the background pieces with dotted lines, so all I had to do was poke out the holes with my awl & draw the faux stitching with a dark green gel pen
  2. Sketch n Stash #69
    • I rotated the sketch 90 degrees counter-clockwise
    • Neglected stash: I used some graph-themed and patterned papers plus keyboard-letter brads I've been saving for quite some time
  3. Use it Tuesday Challenge #14
    • Back to School theme
    • Hoarded supplies: I ventured into the attic & rescued some very cool paper: a sheet of actual Crayola-brand crayon wrappers that my husband got for me at a local printer's

Inspiration:
Sketch n Stash #69
Use it Tuesday Challenge #14: Back to School
Bugaboo Wacky Wednesday CDAC Challenge #17: Paper-Piercing & Faux Stitching

Stamps: CDAC 400 Follower Freebies by Bugaboo Stamps, Verve Stamps, the Paper Studio

Paper: Hammermill, Core'dinations, Recollections, Five&Dime
Tools: Tim Holtz paper distresser, awl, Fiskars papercutter & punch, MS scissors, Marvy punch & heat tool, Recollections punch, HP printer & ink, Adobe InDesign
Other: Tacky glue, Elmer's gel pen, stash twine, Around the Block brads, Stampendous embossing powder, Versamark watermark ink

Wednesday, August 31, 2011

Fallin' for Karen's Doodles

I hardly need an excuse to use this cute Fall image from Karen's Doodles, but couldn't resist their current sketch challenge.

I made the charms with Shrink plastic. I stamped the original stamp on the inside of the card, so you can see the size difference.


Inspiration:
Karen's Doodles Challenge: Sketch

Stamps: Fall by Karen's Doodles, Let It Shine set by Verve Stamps
Paper: Hammermill, Core'dinations
Tools: Fiskars papercutter, Martha Stewart scissors, HP printer & ink, Adobe InDesign, SCAL & Cricut, Marvy heat tool, Shrink plastic
Other: ZipDry & Tacky glues, StazOn ink, Michaels & Offray ribbons, Copic markers

Update 9/6/11: I won a random prize for this card at Karen's Doodles!

Hiya

The current challenge at MelJen's Designs is Blast from the Past, where we share the very first card we ever made using one of her images. Her Dandelion Mouse is one of my favorite digis. Here's my first card:

I love this stamp so much that I rented the Lawn King set from Raisin Boat solely for the included dandelion stamp! And I didn't even stamp the whole thing! Here's my new card with Dandelion Mouse, also inspired by the current Deconstructed Sketch:
Inspiration:
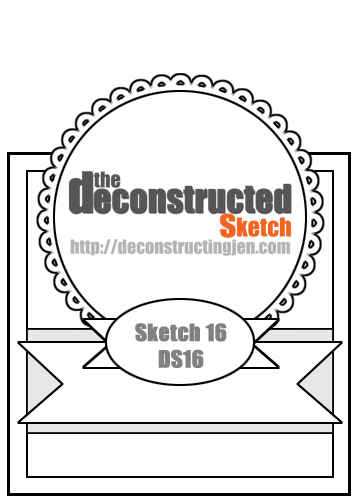
Deconstructed Sketch #16

Stamps: Dandelion Mouse by MelJen's Designs (thank you!), Lawn King set by Raisin Boat
Paper: DCWV Blossoms & Butterflies 8x8 pack, Hammermill, Recollections
Tools: Fiskars papercutter, Martha Stewart scissors, HP printer & ink, Adobe InDesign, SCAL & Cricut, Kut-Ups font, Marvy heat tool, Shrink plastic, sewing machine & thread
Other: ZipDry & Tacky glues, Memento ink, American Crafts & Michaels ribbons, Sakura gel pens, stash metal frame
Copic markers: E13, E17, Y13, B23, BG000, G07, YG03, YG67, Y000, RV02, E000


Wednesday, August 24, 2011

Happy Travels with Deconstructed Sketches and Karen's Doodles

Inspiration:
Deconstructed Sketch No. 15

Stamps:
On the Road Again by Karen's Doodles, Round Sentiments I set by SP & Company, dotted frame set by Fiskars
Paper: Recollections, Hammermill
, Core'dinations, stash DP
Tools: Fiskars papercutter, Martha Stewart scissors & border punch, HP printer & ink, Adobe InDesign, Marvy heat tool
, Cricut & SCAL, Crop-O-Dile, Tim Holtz paper distresser
Other: ZipDry glue, Versamark & StazOn inks, Stampendous embossing powder, Sakura gen pels
, Walk in My Garden Cricut cartridge, stash eyelets & brad
Copics: R35, YG67

Monday, August 22, 2011

"If Graffiti changed anything it would be illegal"

I was so excited to see the "Inspired by Banksy" challenge at Daring Cardmakers. If you're not familiar with Banksy, he's a graffiti artist out of Britain. His work isn't always easy to look at, but it's as powerful as any social satirist's. Be sure to check out the incredible DT & challenge projects.

My husband & I spent a nice bit looking at some of Banksy's work online, and he gave me the following suggestion for color theme: "Slightly militaristic...greens & browns...can you do a shiny black?" You know I can, Baby! 

I decided to make a card and then add the slightly satirical "graffiti". I designed the stencils in SCAL and cut them onto adhesive masking paper with my Cricut. I made the base card first, then added the stencils separately. The dog is inked with black ink (using a paper towel), then sprayed with Frost glimmer mist. The sentiment was inked the same way, but then inked again with watermark ink & heat-embossed in (shiny!) black.

The base card was inspired by Sketch n Stash. For their requirement to use "your newest or neglected stash", I pulled out my long-neglected decorative tape. Humph, that stuff isn't as easy to use as one might think! But I love it. I also pulled out this "Hello Friend" sentiment embossing folder that I haven't used since purchasing.

"Hello Friend" is dry-embossed with the Sizzix Boutique on Core'dinations paper, and sanded to bring out the sentiment.
The blue-green and brown ribbons are colored with Copics. I used the dog-shaped mask & a scrap to create the inside. I sprayed it with glimmer mist, after edging the message section with black ink.

Inspiration:
Daring Cardmakers: Inspired by Banksy
Sketch n Stash Challenge #68

Stencils: Begging Dog from Zazzle, Good Foot font by PizzaDude
Paper: Core'dinations
Tools: Fiskars papercutter, Cricut, SCAL, Marvy heat tool, Tim Holtz paper distresser & scissors, Sizzix Texture Boutique & embossing plate, Inkadinkado stamp masking paper, sandpaper, paper towel
Other: Tattered Angels glimmer chalk spray (Frost), ZipDry glue, Versamark & Memento inks, Stampendous embossing powder, decorative tape from Michael's, Offray & Celebrate It! ribbon
Copics: BG49, E47

Sunday, August 21, 2011

When life gives you lemons, make fruit salad

You may remember my recent "Little Sunshine" card; well, Mom suggested that I make the same family another card for their granddaughter plus their two current foster children. That's the kind of suggestion I live for. I can't tell you how much I respect these folks: they have opened their hearts and home to many foster children over the years, adopting several and helping others to live happy childhoods until they can be adopted. Now that's what I call courage.

Inspiration:
iCopic Blog Hop Challenge: All about Children
Simon Says Stamp: Food & Drink
Card Positioning Systems Sketch #232

Stamps: Crayons The Baby and Picnic Ally-n-Edward by Tellen's Place Designs, Round Sentiments I set by SP & Company
Paper: Recollections, Hammermill
, Core'dinations, stash DP
Tools: Fiskars papercutter, Martha Stewart scissors, HP printer & ink, Adobe InDesign, Marvy heat tool
, Sizzix Texture Boutique, EK Success corner punch
Other: ZipDry glue, Versamark watermark ink, Stampendous embossing powder, AtYou Spica glitter pen

Copics: E37, E47, E17, E35, E33, E13, E11, Y08, YR12, Y13, Y04, Y17, Y02, YR31, RV02, RV11, G02, BG09, BG49, YG67, YG41, B00, BG000, B32, B23, B05, FB2, B39, B18, B28, BV02, BV00, BV000, V17, V06, R27, YR04, FY1, FBG2

Saturday, August 20, 2011

Back to School, primarily

So have you heard yet about the upcoming blog hop and party at Feline Playful? Let me tell you, it's gonna be amazing. I save so much time being able to consult their challenge lists, and am always finding new blogs. Someone pointed out that expecting sponsors & followers is nothing but vanity, which may well be true but I'm not quite sure what part of participating in challenges isn't a soft form of vanity, so put your makeup on & fix your hair up pretty [ref.] and meet me & the fantastic group there on September 21.

Anyhoo, I have a huge list of cards I should be working on, but I wanted to make a back-to-school card for our teenaged nieces. 
For the images, I pulled out some of my favorite digis from Tiddly Inks and Just Some Lines. I was especially pleased to see that the current challenge at Just Some Lines is Embossing: I love me some embossing, any kind! The chair was printed on yellow cardstock and dry-embossed with my Sizzix. The sentiment frame is heat-embossed in ruby.
I paper-pieced the book image with matching papers. Love Graphics 45!

Inspiration:
Just Some Lines Challenge: Embossing
Fairy Tale Challenge #22: Back to School
Delightful Challenges: Back to School/Primary Colors

Stamps: Schoolgirl set by Tiddly Inks, Amber Reads by Just Some Lines, Let It Shine set by Verve Stamps, the Paper Studio
Paper: Graphics 45, Hammermill, Recollections
Tools: Fiskars papercutter, Martha Stewart scissors & border punch, HP printer & ink, Adobe InDesign, Marvy heat tool, Sizzix Texture Boutique, Tim Holtz embossing folder
Other: ZipDry glue, Scotch foam tape, Versamark & Memento inks, Recollections embossing powder, Copic markers, Sakura gel pen

Tuesday, August 2, 2011

Fun with Stampin' Dymonz and Friends

First off, I want to let ya'll know about the Buttons, Charms 'n' Bling Giveaway at Romina's Creative Crafts, running through August 15. Oh my gosh, I don't know what I'd do if I won, it's so incredible! I don't do a lot of blog candy contests (relatively speaking), but I do like how we find new blogs that way. So check out the blog candy badges on my left sidebar, plus my needs-to-be-updated link list on the bottom of my site.

On to the crafting: I spent a few hours this weekend at Stampin' Dymonz Scrap Shack in Baltimore, and it was too much fun. I even got to meet TerryO, which was pretty momentous for me (I'm such a groupie). As soon as I got home I signed up for two upcoming crops! I was too busy chatting most of the time to do any actual crafting, but I did color one of her stamps, this Cardinal-and-Poinsettia beauty (I think from Stampin' Up?). I stamped it twice, and used the second piece to pop the cardinal, and for the poinsettias on the inside (see below).

For the card design I used the great sketch at Sparkle Creations' Christmas Card Challenges.

I decided to play with some more shrink plastic, so I took a cue from the Use a Tag theme at the SDSS Christmas Card Club and made a tag from it. I used a border punch for the bottom. The tag is stamped with red StazOn and colored with green Copics after shrinking, but I used stamp markers for the buttons (on left). I sewed them on with green thread.

I ran across Jeannie's wildly beautiful shrink plastic projects, and boy! has she outdone herself yet again. Check out the little ring at the bottom of her post. And for all you members of the SDSS Off the Page Group, let this be a little hint for an upcoming project!
I hadn't originally realized that the Poinsettia stamp I wanted to pair this with was also from Stampin' Up, but it certainly worked out nicely. The sentiment is from a Lili of the Valley set I'm "saving" for Mom. The circle borders are hand-stamped; I love my Fiskars Dots border set!
Dymonz also introduced me to "medium round" nibs for Copic markers, which I like a lot but not as much as I thought. I thought I was going to want to throw out all my brush nibs, but I'm so used to them. I replaced a few of my chisel nibs with these; I only use the chisel for edging but I do love it for that.

Friday, July 29, 2011

Making a Splash

I had too much fun making the shrink-plastic charm for my LOTV Christmas card, and couldn't wait to try some more. So when I was going through my Blog Feed that morning I was really tickled to see these gorgeous shrink-plastic earrings by Lola Cordova on the Bugaboo Stamps blog. Guess who's putting printable shrink-plastic on her shopping list?! (Lola, you left a lovely comment on my flip-book post while I was writing this...thank you! And never say you "can't" because you'll find yourself doing it!)

Something I've wanted to try for some time is matching a shrunk stamp with the original stamp. I started with this beautiful splash stamp from Raisin Boat. The main image is that stamp four times in four blues, one of which is heat-embossing. I then sprayed the whole thing with "Frost" glimmer mist. The brad is stamped with two smaller splashes that came in the set, and sprayed with the same glimmer.

For the shrink-art, I used StazOn to stamp the large splash onto clear shrink plastic, cut it out, punched a hole, and shrunk it with my heat tool. I strung the finished piece onto some clear plastic beading thread, added a couple of faux-pearl beads and a clasp. As you can see in the photo on the right, the image shows up sorta transparent on the skin.

I then taped up the chain and hung the necklace onto the card, using the brad to help hold it down. I've had this idea in my head for a while, but the photo and sketch inspirations at Birthday Sundaes and CPS really brought it all together.

Inspiration: CPS Sketch #228 (on right)
Birthday Sundaes Challenge #19: Inspiration Photo (on left)

Stamps: Raisin Boat, Inkadinkado
Paper: Core'dinations, Recollections, stash
Tools: Marvy heat tool, Fiskars papercutter, Marvy punch, Crop-O-Dile, Tim Holtz paper distresser & scissors, shrink plastic
Other: ZipDry glue, Stampendous embossing powder, Versamark, Memento & StazOn inks, Copics, brad from stash, Tattered Angels glimmer mist, stash jewelry supplies, stash pearl beads

Tuesday, July 26, 2011

Playin' with Lili of the Valley

Mom ordered some stamps & images from Lili of the Valley, and they've made a nice little stop at my house first! I couldn't resist playing with the stamps; they are so lovely and so much fun to color. And Mom, let's not forget to check out their 2011 Christmas sets (link will open in a new window)!

I just had to try my hand at the following challenges:I also tried my hand at an idea Mom shared some time ago: making a detachable charm out of Shrink plastic. As they say, if all else fails do as your mother told you in the first place! So this time, I sanded one side of the plastic before stamping and coloring. Actually, I stamped the image onto the smoother side with StazOn, and colored the rough side with Copics before shrinking with my heat tool. This is something I'll have to practice, but the result sure is cute! Click on the image to enlarge.
Stamps: Merry Christmas A5 set by Lili of the Valley, Fiskars
Paper: Recollections, Brazzill, Hammermill
Tools: Martha Stewart border punch, Fiskars papercutter, Sizzix Texture Boutique

Other: ZipDry glue, ZIG glue pen, ATYOU Spica glitter pen, brads from Around the Block & Oriental Trading Co., shrink-plastic, Versamark, StazOn & Memento inks, English Christmas gift wrap ribbon (thanks Sandra!), Recollections flocking
Copics: E17, BV02, BV000, BV00, B63, BV04, R37, R35, RV04, G99, YG03, YG63, Y17, E35, C-1, B00, BG000, E13,RV02, E000

Coolin' off with Christmas in July (for Anne-Marie K, Ha ha!)

So one of my blogging buddies, Anne-Marie of Little-Applefalls, always leaves me the most ego-boosting & funny-bone-tickling comments, and she said this in response to my recent purple-themed card: "Purple....ok....I'm tryin' to like the colour....er...still tryin'....nope, can't do it....BUT...love the ickle birdhouse...lol! So....nuff with the purple, girlie!" Sorry sweetie, too late!!! So Anne-Marie, my challenge to you is to make something all in pinks 'cause I can't get into that color!

Like many of you, I've gotten caught up in Holiday card challenges, and this week there's a nice group of choices that I pulled from for this project: I think one of my favorite things about the color purple is that it doesn't occur frequently in nature ...it's closest to Violet, but that's just sorta between Indigo and Blue... It's also the shared favorite color of myself & my husband, so it makes me feel good. I've enjoyed its incorporation into the Christmas Colors; as soon as I saw this Bugaboo image, I just saw her all dressed in purple! There's something so royal about purple...and red...and green!
As I mentioned at the beginning of this post, I bought paper especially for this project. I don't usually do that; I like to work with what I have. But I didn't have any real purples of anything (it's my favorite color, but I don't often craft with it). So I grabbed 3 different sheets for about $1.50 all together, and I think I made good use of it! Plus, I have some scraps for a future purple-themed project...Anne-Marie, I'm sure you're looking forward to that, ha ha!

I also took a cue from last week's Christmas Card theme at SDSS --
Make your own backing paper -- and made some complementary paper by spraying Haunted Shadows glimmer mist onto regular cooking parchment from the kitchen (Honey, remind me to put it on our shopping list before we bake anything!). I let the spray-ink dry for 10 minutes or so, then dried the parchment with my heat tool. There were still large dots of ink, which I mashed down by placing a paper towel on top on it. Those dots became the lovely soft glitter color. Then I folded a small piece as if I were wrapping a package.

Stamps: Bugaboo Digital Stamps (thank you!)
Paper: Recollections, Brazzill, Hammermill, kitchen parchment

Tools: Martha Stewart border punch, Fiskars papercutter, Sizzix Texture Boutique

Other: ZipDry glue, ATYOU Spica glitter pen, Sakura GellyRoll pen, Simplicity lace, Tattered Angels glimmer mist, English Christmas gift wrap ribbon (thanks Sandra!), Sprite can, Around the Block brads, Polar White FlowerSoft
Copics: E000, E13, YR01, E17, RV02, BV02, BV00, BV000, B63, V17, BV04, BV08, V06

Saturday, July 23, 2011

Enjoying the Journey...in purple

Paulette at TLC Creations recently gave out a special image to her CDAC followers, and as soon as I saw it I knew I had to pair it with Marion's sentiment that I used for my recent flower card. I sprayed purple glimmer mist onto a black ribbon. I whipped this together this morning, before shocking myself and cleaning the bathroom...like, with a toothbrush. A clean home signifies a clean soul! Guess you gotta shake out the dust bunnies every once in a while! Actually, the bird house is close to the color of our actual house...and we both love purple.

I took both images into PhotoShop, used the magic wand tool to select parts of the image, and added a "color overlay". I chose the gorgeous palette over at The Play Date Challenge and the groovy Deconstructed Sketch.

Inspiration:
Play Date Challenge #90
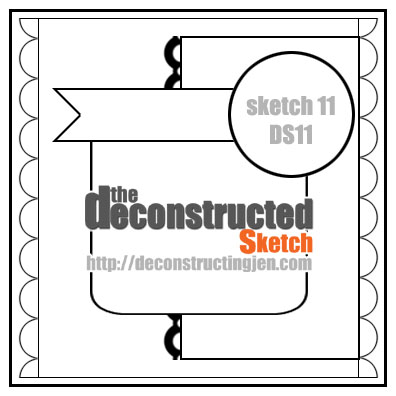
Deconstructed Sketch No. 11

Digi Stamps: Vintage New Home by TLC Creations, Happiness Ticket by When the Scrap Hits the Fun

Paper: Core'dinations, Recollections, Hammermill
, stash DP
Tools: HP printer & ink, Adobe PhotoShop & InDesign, Fiskars papercutter & punch, Tim Holtz scissors, Recollections punch, EK Success corner punch, Martha Stewart border punch
Other: ZipDry glue, Stampendous embossing powder, Versamark ink, AtYou Spica glitter pen, Elmer's gel pen, Copics, stash ribbon (Thanks Sandra!), Tattered Angels glimmer mist