I found this wonderful Butterfly Sail Boat digi at Beyond the Fringe Crafts some time ago, and I finally made a card with it for Little Claire's Things with Wings challenge.It's a penny-rocker, or tilt, card. I think my favorite part of this card is how that bean-shape butterfly body sorta swings out.The inside is simple, with another little butterfly:
 I was naughty and didn't edge the foam tape; I should have colored it before adhering it because by then it was too thin, but oh well!Inspiration:Little Claire's Monthly Challenge # 11: Things with WingsTilt Card tutorial: Splitcoast Stampers Stamps: Butterfly Sail by Beyond the Fringe Crafts, StudioGPaper: Recollections, Hammermill, Dots & Stripes from Echo ParkTools: Fiskars papercutter, Tim Holtz scissors, HP printer & ink, Adobe InDesign, paper trimmer with scallop bladeOther: ZipDry glue, Versamark & Memento inks, AtYou Spica gel pen, Smirk glitter pen, Offray ribbon, foam tape & pop-dotCopics: E13, E17, FBG2, B0000, Y000, Y02, BG15, BG49, YG41, G02
 I had too much fun making the shrink-plastic charm for my LOTV Christmas card, and couldn't wait to try some more. So when I was going through my Blog Feed that morning I was really tickled to see these gorgeous shrink-plastic earrings by Lola Cordova on the Bugaboo Stamps blog. Guess who's putting printable shrink-plastic on her shopping list?! (Lola, you left a lovely comment on my flip-book post while I was writing this...thank you! And never say you "can't" because you'll find yourself doing it!)Something I've wanted to try for some time is matching a shrunk stamp with the original stamp. I started with this beautiful splash stamp from Raisin Boat. The main image is that stamp four times in four blues, one of which is heat-embossing. I then sprayed the whole thing with "Frost" glimmer mist. The brad is stamped with two smaller splashes that came in the set, and sprayed with the same glimmer.
 For the shrink-art, I used StazOn to stamp the large splash onto clear shrink plastic, cut it out, punched a hole, and shrunk it with my heat tool. I strung the finished piece onto some clear plastic beading thread, added a couple of faux-pearl beads and a clasp. As you can see in the photo on the right, the image shows up sorta transparent on the skin.I then taped up the chain and hung the necklace onto the card, using the brad to help hold it down. I've had this idea in my head for a while, but the photo and sketch inspirations at Birthday Sundaes and CPS really brought it all together.

 Inspiration: CPS Sketch #228 (on right)Birthday Sundaes Challenge #19: Inspiration Photo (on left)
 Stamps: Raisin Boat, Inkadinkado Paper: Core'dinations, Recollections, stashTools: Marvy heat tool, Fiskars papercutter, Marvy punch, Crop-O-Dile, Tim Holtz paper distresser & scissors, shrink plasticOther: ZipDry glue, Stampendous embossing powder, Versamark, Memento & StazOn inks, Copics, brad from stash, Tattered Angels glimmer mist, stash jewelry supplies, stash pearl beads
 Mom ordered some stamps & images from Lili of the Valley, and they've made a nice little stop at my house first! I couldn't resist playing with the stamps; they are so lovely and so much fun to color. And Mom, let's not forget to check out their 2011 Christmas sets (link will open in a new window)!I just had to try my hand at the following challenges:I also tried my hand at an idea Mom shared some time ago: making a detachable charm out of Shrink plastic. As they say, if all else fails do as your mother told you in the first place! So this time, I sanded one side of the plastic before stamping and coloring. Actually, I stamped the image onto the smoother side with StazOn, and colored the rough side with Copics before shrinking with my heat tool. This is something I'll have to practice, but the result sure is cute! Click on the image to enlarge.
 Stamps: Merry Christmas A5 set by Lili of the Valley, FiskarsPaper: Recollections, Brazzill, Hammermill
Tools: Martha Stewart border punch, Fiskars papercutter, Sizzix Texture BoutiqueOther: ZipDry glue, ZIG glue pen, ATYOU Spica glitter pen, brads from Around the Block & Oriental Trading Co., shrink-plastic, Versamark, StazOn & Memento inks, English Christmas gift wrap ribbon (thanks Sandra!), Recollections flockingCopics: E17, BV02, BV000, BV00, B63, BV04, R37, R35, RV04, G99, YG03, YG63, Y17, E35, C-1, B00, BG000, E13,RV02, E000
 So one of my blogging buddies, Anne-Marie of Little-Applefalls, always leaves me the most ego-boosting & funny-bone-tickling comments, and she said this in response to my recent purple-themed card: "Purple....ok....I'm tryin' to like the colour....er...still tryin'....nope, can't do it....BUT...love the ickle birdhouse...lol! So....nuff with the purple, girlie!" Sorry sweetie, too late!!! So Anne-Marie, my challenge to you is to make something all in pinks 'cause I can't get into that color! Like many of you, I've gotten caught up in Holiday card challenges, and this week there's a nice group of choices that I pulled from for this project: I think one of my favorite things about the color purple is that it doesn't occur frequently in nature ...it's closest to Violet, but that's just sorta between Indigo and Blue... It's also the shared favorite color of myself & my husband, so it makes me feel good. I've enjoyed its incorporation into the Christmas Colors; as soon as I saw this Bugaboo image, I just saw her all dressed in purple! There's something so royal about purple...and red...and green!
 As I mentioned at the beginning of this post, I bought paper especially for this project. I don't usually do that; I like to work with what I have. But I didn't have any real purples of anything (it's my favorite color, but I don't often craft with it). So I grabbed 3 different sheets for about $1.50 all together, and I think I made good use of it! Plus, I have some scraps for a future purple-themed project...Anne-Marie, I'm sure you're looking forward to that, ha ha!
I also took a cue from last week's Christmas Card theme at SDSS -- Make your own backing paper -- and made some complementary paper by spraying Haunted Shadows glimmer mist onto regular cooking parchment from the kitchen (Honey, remind me to put it on our shopping list before we bake anything!). I let the spray-ink dry for 10 minutes or so, then dried the parchment with my heat tool. There were still large dots of ink, which I mashed down by placing a paper towel on top on it. Those dots became the lovely soft glitter color. Then I folded a small piece as if I were wrapping a package. Stamps: Bugaboo Digital Stamps (thank you!)
Paper: Recollections, Brazzill, Hammermill, kitchen parchment
Tools: Martha Stewart border punch, Fiskars papercutter, Sizzix Texture BoutiqueOther: ZipDry glue, ATYOU Spica glitter pen, Sakura GellyRoll pen, Simplicity lace, Tattered Angels glimmer mist, English Christmas gift wrap ribbon (thanks Sandra!), Sprite can, Around the Block brads, Polar White FlowerSoft
Copics: E000, E13, YR01, E17, RV02, BV02, BV00, BV000, B63, V17, BV04, BV08, V06
I've run across a few great blog candy contests recently, so I thought I'd include them in one post:Kona Krafter is celebrating the fact that Stitchy Bear Digital Stamps is running an ad campaign in Papercraft Essentials. You have 3 chances to win her awesome prizes! And don't forget to participate in the August Challenges at One Stitch at a Time (OSAAT).Whismy Stamps, another wonderful shop dedicated to digi artists, is offering a mystery prize to celebrate their new challenge blog. Challenges begin August 10; I know I can't wait!
And don't forget the Blogging is for Sharing Giveaway at Imagine.Create.Express. You can participate as many times as you like, and there's always great stuff being added.
 And here's some fairly useless news: Priyanka of Gillu's Gallery shot me an email to congratulate me on making the top 3 at OSAAT! Thanks everyone, I'm super-honored! I had so much fun making my card; and be sure to check out their current contest; one of the DT members made an especially gorgeous card with the Bengali Bride image by Gillu's Gallery. Also, I see that there's a pre-colored version at her shop now!
 Paulette at TLC Creations recently gave out a special image to her CDAC followers, and as soon as I saw it I knew I had to pair it with Marion's sentiment that I used for my recent flower card. I sprayed purple glimmer mist onto a black ribbon. I whipped this together this morning, before shocking myself and cleaning the bathroom...like, with a toothbrush. A clean home signifies a clean soul! Guess you gotta shake out the dust bunnies every once in a while! Actually, the bird house is close to the color of our actual house...and we both love purple. I took both images into PhotoShop, used the magic wand tool to select parts of the image, and added a "color overlay". I chose the gorgeous palette over at The Play Date Challenge and the groovy Deconstructed Sketch.
 Inspiration:
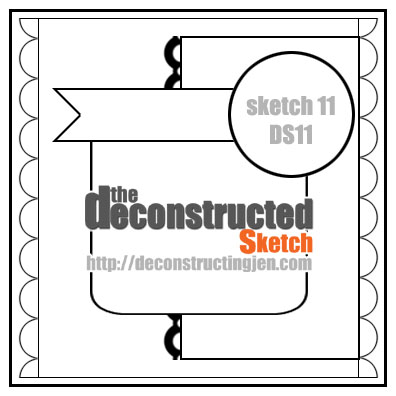
Play Date Challenge #90Deconstructed Sketch No. 11 Digi Stamps: Vintage New Home by TLC Creations, Happiness Ticket by When the Scrap Hits the Fun
Paper: Core'dinations, Recollections, Hammermill, stash DPTools: HP printer & ink, Adobe PhotoShop & InDesign, Fiskars papercutter & punch, Tim Holtz scissors, Recollections punch, EK Success corner punch, Martha Stewart border punchOther: ZipDry glue, Stampendous embossing powder, Versamark ink, AtYou Spica glitter pen, Elmer's gel pen, Copics, stash ribbon (Thanks Sandra!), Tattered Angels glimmer mist
 In case you haven't heard yet, TLC Creations is having a contest to celebrate its first year on the Crafter's Digital Art Center (CDAC). [It took me forever to put together that the hostess for the CDAC group is none other than the Purple Card Lady.] It's a fun challenge: you choose from 2 digis and come up with a sentiment for it. Winners will have their sentiments transformed in Paulette's beautiful wordart. I didn't want to over-think this, as we only have 3 days until the deadline, so I made this quick card (but truly heart-felt) with some of my favorite papers. Can't wait to see everyone's projects!
 Inspiration: TLC Creations at CDAC 300 Member Party & 1 Year CelebrationImages & Linky: Create with TLCRules: CDACStamps: Vintage Learn to Walk by TLC Creations (for contest)Paper: Core'dinations, Graphics45, Five&Dime, HammermillTools: HP printer & ink, Marvy heat tool, Fiskars papercutter & punch, Marvy punch, Crop-O-Dile, Tim Holtz paper distresser & scissorsOther: ZipDry glue, Stampendous embossing powder, Versamark ink, AtYou Spica glitter penCopics: B05, B23, B32, B00, B0000, YG63, YG41, YG67, G21, YG03, RV11, E13, YR01, YR31, E50, E000
 Stitchy Bear is having a month-long contest in August for cards to feature in their ad for the October issue of PaperCraft Essentials magazine. Looks really fun, so mark your calendars!Stitchy Bear Digital Stamps Online Shop is such a great resource for many different brands of digi stamps. One of my favorites, Gillu's Gallery, is now selling there too. They have a challenge blog, One Stitch at a Time, and their current challenge is Flowers. Perfect opportunity to use the Pretty Girl digi from Gillu's Gallery, as well as to try my hand at a paper-punch flower technique I saw in PaperCraft Inspirations magazine (Jan. 2011).
 I tried my hand at a paper-punch flower technique I saw in PaperCraft Inspirations magazine (Jan. 2011), and I'm really happy with the result. I didn't glue myself to it once! For the middles, I made some tiny buttons from shrink plastic (see my previous post), colored them black, and sewed them on.I used the current Midnight Madness Sketch, but I chose the color combo myself. Everything's colored and/or edged with Copics, including the paper I used for the punch flowers.I'm entering this card into Aud Sentiments Challenge #33: "Enjoy Your Day", thanks to this lovely sentiment by Marion.
 Inspiration:One Stitch at a Time Challenge #77: FlowersMidnight Madness Sketch Challenge #113 Aud Sentiments Challenge #33: "Enjoy Your Day"Stamps: Pretty Girl by Gillu's Gallery, For all Mothers set by SP & Company, Happiness Ticket by When the Scrap Hits the Fun
Paper: Hammermill, Recollections, Core'dinations, shrink plastic from stash
Tools: InDesign, HP printer & ink, needle, awl, Fiskars papercutter, Recollections punches, Crop-O-Dile, Tim Holtz paper distresser & scissors, EK Success corner punch
Other: ZipDry glue, bakers twin, stash ribbon (Thanks Sandra!), Copic markers
Update 6/25/11: This card made the top 3 at OSAAT!
 So how did I manage without knowing about Feline Playful until now?! It's such a wonderful resource for challenges, and I love all the info that's included. It's also really handy when you want to make a card for a challenge, but know you want to include something specific. For example, I wanted to participate in a challenge, but I wanted to include buttons and flowers on whatever I made, so I did a quick search on Feline Playful and ta da I discovered MelJen's Buttons & Bows challenge, as well as Scrappy Frogs and their Summer Flowers challenge. I was also able to find the perfect sketch, at Stampin' Royalty, thanks to their pictorial list!
 The reason I was so keen on using buttons was because I saw a great tutorial on How to Make Buttons from Shrink Plastic at scissors.paper.wok yesterday, and finally pulled out the shrink plastic Mom sent me. I was really surprised how easy these were. To make the daisy buttons, I started by making a template on plain white paper: I punched a 2-inch circle, folded it in half, and made the eye-holes with a 3/16 punch. Then I punched circles out of the shrink plastic and used the template to make the smaller holes. I stamped this lovely Daisy from SP & Company onto the plastic circles, using StazOn ink. To shrink the circles into buttons, I used my heat tool. That thing is amazing. It all happens really fast: the plastic crumples up & then suddenly flattens out into a circle (or, in my case, an oval, which was fine with me). I highly recommend using a surface with a lip (I used the top of a metal gift can) and something long to keep the plastic in place (used my reverse-action tweezers; just don't touch the hot metal!). To make sure it stays flat after melting, I used a tip from Mom: put a wooden stamp on it (wood-side down) immediately after shrinking. I used Copics to color the buttons after shrinking.I made a tiny flower using the same process but smaller punches, and made a plain button that I then covered in yellow flocking.
 I went ahead and chose my own color combo. I couldn't help making the daisies Black-eyed Susans, as they're blooming here and are so beautiful.
 Inspiration:Scrappy Frogs Challenge: Summer FlowersMelJen's Designs Challenge #67: Buttons and BowsStampin' Royalty Challenge #81: SketchTutorial: How to Make Buttons from Shrink Plastic at scissors.paper.wok Stamps: Dandelion Mouse digi by MelJen's Designs, For all Mothers set by SP & Company, Happiness Ticket by When the Scrap Hits the Fun
Paper: Hammermill, Recollections, pre-embossed paper from stash, shrink plastic from stash
Tools: InDesign, HP printer & ink, needle, awl, Fiskars papercutter, Recollections punches, Crop-O-Dile, Tim Holtz paper distresser & scissors
Other: ZipDry glue, ZIG glue pen, Offray & Bargain ribbon, Recollections flocking powder, Copic markers, Versamark ink
 I'm super tickled that the "ticket corners" trick Mom & I shared at Top Tip Tuesday last week won their Top Tipper prize! We're such a great team (and we look & sound so alike). We're gonna have to figure out a way to share the prize, which is 3 digis from Karen's Doodles. I couldn't wait to hear back from Karen, though, and bought her First Taste of Snow to use for a Christmas card along with a ticket sentiment from When the Scrap Hits the Fun (Marion's blog). Her tickets helped inspire our "ticket corners" tip, so this card is sort of a celebration. It has lots of ticket corners!
 Marion recently posted the loveliest Christmas-themed ticket -- please take a moment to check out her incredible shaker card -- and I totally lucked out that this week's colourQ combo includes the purple of the ticket. I was blown away by Julia's decidedly nontraditional Christmas card, and decided to use the bright colourQ combo as a cue for the Xmas in July challenge at Creative Inspirations. I'm also entering this into the Faith theme at the 2011 Christmas Card Challenge, and used the fab circle-and-rectangles sketch from Paper Cupcakes Magic Monday.
 I kinda started this story at the end, because my first thought for this card came from Helen's Make your Own Backing Papers (BP) trigger for the Christmas/Holiday Card Club at Stampin' Dymonz Scrap Shack. I took the super-easy route of stamping & heat-embossing a snowflake to create my papers: I used white powder on the white paper, transparent yellow powder on the yellow, and clear powder on the green. The inside green piece isn't heat-embossed, just stamped with watermark ink. It's difficult to see the embossing in the photo on the right but if you click on it, it will enlarge & you can see more detail.
I had terrible fun coloring the image, and it just screamed for textural embellishment. First, I used my heat-activated Marvy Snow pen for the snowflakes. Then I used my glue pen to add some color-matched flocking: white on the snow, green on the cuffs, yellow on the collar, and purple on the ear-muff.
The boots are coated with Glossy Accents. The doily was sprayed with Tattered Angels glimmer mist, because I wouldn't bring myself to just leave it white! Everything is edged with a Copic marker (G07 / Nile Green).


 Inspiration:Stampin' Dymonz Scrap Shack Christmas Card Club: Make Your Own BPCreative Inspirations Challenge #64: Xmas in July2011 Christmas Card Challenge Week #33: FaithPaper Cupcakes Magic Monday: SketchcolourQ challenge #94: Tangerine Tango, Green Galore, Daffodil Delight, Rich Razzleberry + white
Stamps: First Taste of Snow by Karen's Doodles, Xmas Ticket by When the Scrap Hits the Fun, stash
Tools: Marvy heat tool, Fiskars papercutter, Tim Holtz scissors, HP printer & ink, Adobe InDesign, awl, hole punchOther: ZipDry glue, ZIG glue pen, Marvy snow pen, Elmer's gel pen, Versamark watermark ink, Glossy Accents, doily from stash, Tattered Angels glitter mist, bakers twine from stash, embossing powders from Stampendous & Hero Arts, flocking from Martha Stewart, Recollections, & StampendousCopic markers: b0000, yr01, e11, e13, rv02, e37, e17, v06, v17, bv00, y06, y17, yr04, yr09, yg03, g07
 I spied Bronte Kisses by Mo's Digital Pencil, and I just had to have it! All proceeds from this $1 digi will go to Pet Orphans of Southern California. This special set includes 3 lovely quotes, and I used one as part of the main image for this card. As you can see by the photo on the right, the resulting card was a big hit. (What you can't see is Allen, the white one, licking and then sitting on the card. It's fine though!)
I wanted the challenge of a color combo, so I chose SPCC's: River Rock (I used Kraft), Bashful Blue, Whisper White. For a sketch, I chose Mojo Monday. I was blown away by Julia's paper-pierced card, so I decided to try my hand at the Sew challenge at Do You Stack Up? (DYSU). I found all sorts of inspiration & tricks at Mel Stampz. Seriously, Mel's tutorials are so good that you totally believe you can do it!
I spied Bronte Kisses by Mo's Digital Pencil, and I just had to have it! All proceeds from this $1 digi will go to Pet Orphans of Southern California. This special set includes 3 lovely quotes, and I used one as part of the main image for this card. As you can see by the photo on the right, the resulting card was a big hit. (What you can't see is Allen, the white one, licking and then sitting on the card. It's fine though!)
I wanted the challenge of a color combo, so I chose SPCC's: River Rock (I used Kraft), Bashful Blue, Whisper White. For a sketch, I chose Mojo Monday. I was blown away by Julia's paper-pierced card, so I decided to try my hand at the Sew challenge at Do You Stack Up? (DYSU). I found all sorts of inspiration & tricks at Mel Stampz. Seriously, Mel's tutorials are so good that you totally believe you can do it!
 I created piercing templates by putting a dotted "stroke" on a square (with the digi) and a circle. I did this in InDesign, but you can do it in Word too. I drew the "thread" with a gel pen and then used my awl to create the holes.
 For a little extra something, I glued white ribbon to cardstock, and ran it through my sewing machine with 2 colors of thread. Funky! I love how my thread collection is a story of items hemmed...Curtains, bedspreads, slacks. All hemmed by Mom, I'm sure. She visits once a year, and it's still faster than waiting for me to do it!
 The dogprint paper is simply stamped with watermark ink. The white background was embossed in my Sizzix. It's a happy accident that my only light blue ribbon also has a stitching theme!
I distressed the edges of the inside pieces; I like how the brown piece kinda looks like leather. I've never understood making dog collars out of leather, though: if you have more than one dog, it's like putting a chew toy on them!
Inspiration:
Mojo Monday #200: Sketch
DYSU Challenge #28: Sew, Faux or Real
SPCC #109: River Rock, Bashful Blue, Whisper White
Faux Stitching tutorial: Mel Stampz (with lots of great links)
Stamps: Bronte Kisses by Mo's Digital Pencil, StampCraft
Tools: Fiskars papercutter, Tim Holtz scissors & paper distresser, HP printer & ink, Adobe InDesign, awl, Sizzix Texture Boutique
Other: ZipDry glue, Elmer's gel pen, stash button, Celebrate It! & Offray ribbons, Versamark watermark ink
Copic markers: YR01, E13, FBG2, B0000, BG000, B05, RV02, E11, E31, E000
The dogprint paper is simply stamped with watermark ink. The white background was embossed in my Sizzix. It's a happy accident that my only light blue ribbon also has a stitching theme!
I distressed the edges of the inside pieces; I like how the brown piece kinda looks like leather. I've never understood making dog collars out of leather, though: if you have more than one dog, it's like putting a chew toy on them!
Inspiration:
Mojo Monday #200: Sketch
DYSU Challenge #28: Sew, Faux or Real
SPCC #109: River Rock, Bashful Blue, Whisper White
Faux Stitching tutorial: Mel Stampz (with lots of great links)
Stamps: Bronte Kisses by Mo's Digital Pencil, StampCraft
Tools: Fiskars papercutter, Tim Holtz scissors & paper distresser, HP printer & ink, Adobe InDesign, awl, Sizzix Texture Boutique
Other: ZipDry glue, Elmer's gel pen, stash button, Celebrate It! & Offray ribbons, Versamark watermark ink
Copic markers: YR01, E13, FBG2, B0000, BG000, B05, RV02, E11, E31, E000
Update 6/25/11: This card won SPCC #109 as well as the random drawing at Mojo Monday. Thanks everyone! I love my Verve stamps from Mojo, and look for my SPCC Guest DT project in the coming months.
When I saw the freebie for the current Tellen's Place Challenge, I just had to mix it with the Flip-flop Card technique and the flip-flop digis I snagged from Shelly's Images.
I was really inspired by the Buttons, Bows, Brads & Bling recipe at Dutch Dare Card Challenges. Happily, I had 2 sizes of blingy brads and star buttons that matched the paper perfectly.I used my Crop-O-Dile to punch a hole in the flower brad to insert the sentiment brad.For the large flip-flops, I printed 2 pairs and popped it with foam tape. I edged the buttons, flip-flops, flower & sentiment brads, and mats with Copics. Here's the front, card closed: ...and opened:
 Here's the back, card closed:
 ...and opened:
 Inspiration:Tellen's Place Designs: Anything GoesDDCC #121: Buttons, Bows, Brads and BlingSwing (Flip Flop) Card tutorial: Splitcoast Stampers (with printable template)Digi stamps: Swimsuit Jess by Tellen's Place Designs, Flip Flops 2 by Shelly's ImagesPaper: Core'dinations, Hammermill, stashTools: Fiskars papercutter & finger knife, Tim Holtz scissors, HP printer & ink, Adobe InDesign, Crop-O-Dile II, needleOther: ZipDry glue, Versamark & Memento inks, Copic markers, Sakura gel pen, Smirk glitter pen, CraftSmart Embroidery thread, awl, buttons from stash (thanks Mom!)Brads: Oriental Trading Co., Recollections
Update 6/25/11: Wow! This card won the Tellen's Place Designs: Anything Goes Challenge. Thank you!
![cg says [something loudly]](http://4.bp.blogspot.com/-NYKVi70Q_N4/Tk3LNv8-l6I/AAAAAAAACYw/5BajE7uH_JI/s1600/blogheader.gif)
 I think my favorite part of this card is how that bean-shape butterfly body sorta swings out.
 I was naughty and didn't edge the foam tape; I should have colored it before adhering it because by then it was too thin, but oh well!


